Table of Content
Introduction
In today’s hyper-competitive sales environment, speed and precision are everything. Sales teams that rely on manual outreach juggling spreadsheets, sticky notes, and disjointed email threads consistently lose deals to competitors who have automated, intelligent workflows in place.
Microsoft Dynamics 365 Sales Accelerator addresses this challenge head-on by introducing High-Velocity Sequences (HVS): a powerful automation framework that lets your sales reps engage prospects at exactly the right moment, with exactly the right message, every single time.
In this step-by-step guide, you’ll learn exactly how to build your first High-Velocity Sequence in Dynamics 365, from initial setup to your first live outreach. Whether you’re a sales manager, CRM administrator, or a rep just getting started, this tutorial will walk you through every click.
What Is a High-Velocity Sequence in Dynamics 365?
A High-Velocity Sequence (HVS) is a structured series of activities — emails, phone calls, LinkedIn touchpoints, and tasks — that are automatically assigned to a sales rep based on predefined triggers and timelines. Think of it as a personalised sales playbook that runs itself.
With Dynamics 365 Sales Accelerator (part of the Sales Premium or Sales Enterprise plan), sequences can be:
- Triggered automatically when a lead or opportunity meets specific criteria
- Customised per segment, industry, or deal stage
- Monitored in real-time with rich analytics
- Connected to your existing Dynamics 365 CRM records seamlessly
Prerequisites: What You Need Before You Begin
Before diving into sequence creation, ensure the following are in place:
1. Licensing Requirements
- Dynamics 365 Sales Premium or Sales Enterprise license
- Sales Accelerator add-on enabled by your Microsoft 365 administrator
- Appropriate user roles: Sales Manager, Sales Accelerator Manager, or System Administrator
2. CRM Configuration
- Leads or Contacts imported and active in your Dynamics 365 environment
- Email server-side synchronization enabled
- Phone call activity enabled (if using call steps)
3. Content Ready
- Email templates drafted and approved
- Call scripts or talk tracks prepared
- LinkedIn messaging guidelines (if leveraging LinkedIn Sales Navigator integration)
- Step-by-Step: Building Your First High-Velocity Sequence
Step-by-Step: Building Your First High-Velocity Sequence
Step 1: Navigate to Sales Accelerator
To begin, log into your Dynamics 365 Sales environment and follow these steps:
- From the left-hand navigation bar, click on the Sales Hub app.
- In the lower-left corner, switch your area from ‘Sales’ to ‘Sales Insights’.
- Under the ‘Sales Accelerator’ section, click on ‘Sequences’.
- You’ll land on the Sequences management page, where all existing sequences are listed.
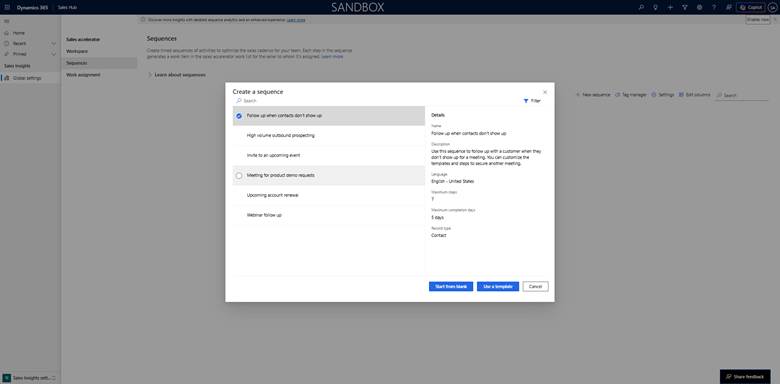
Step 2: Create a New Sequence
On the Sequences page, click the ‘+ New Sequence’ button in the top-right corner. A sequence creation wizard will appear.
You’ll be prompted to configure the following:
Sequence Name & Description
- Choose a clear, descriptive name such as: “Enterprise SaaS Inbound Lead – 7-Day Sequence”
- Add a description to help your team understand the sequence’s purpose
- Select the Entity type (Lead or Opportunity) this sequence applies to
Segment Targeting (Optional but Recommended)
Dynamics 365 allows you to target sequences to specific segments. For example, you might create one sequence for SMB leads and a different one for enterprise accounts. Define your segment filters using fields like:
- Industry
- Lead Source
- Annual Revenue
- Geography / Region
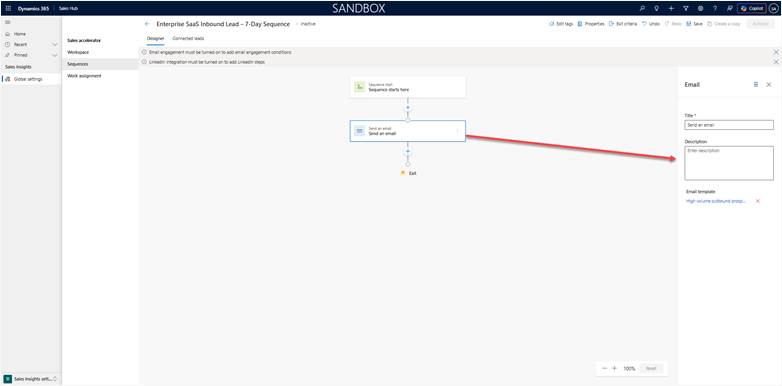
Step 3: Add Your First Activity Step — Email
Click ‘Add a step’ to begin building the sequence timeline. For your first step, select ‘Send an email’.
Configuring the Email Step
- Choose a pre-built email template or create a new one inline.
- Set the ‘Due in’ field — this determines when this step becomes active. For step 1, set it to ‘Immediately’ or ‘Day 0’.
- Toggle on ‘Auto-send’ if you want emails dispatched without rep intervention, or leave it off for rep-assisted sending.
- Optionally, add conditions: e.g., only trigger this step if the lead’s status is ‘New’.
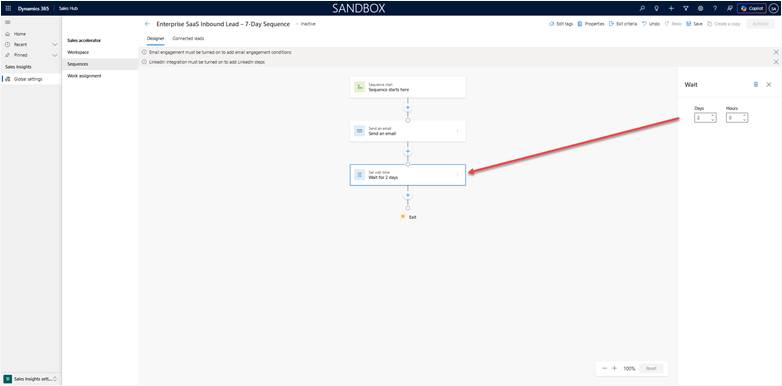
Step 4: Add a Wait Period
After your opening email, it’s critical to add a wait step before following up. This mimics natural human conversation timing and avoids coming across as spammy.
- Click ‘Add a step’ → select ‘Set wait time’.
- Set the duration — 2 business days is a proven benchmark for B2B outreach.
- Optionally, configure the wait to pause on weekends or public holidays.
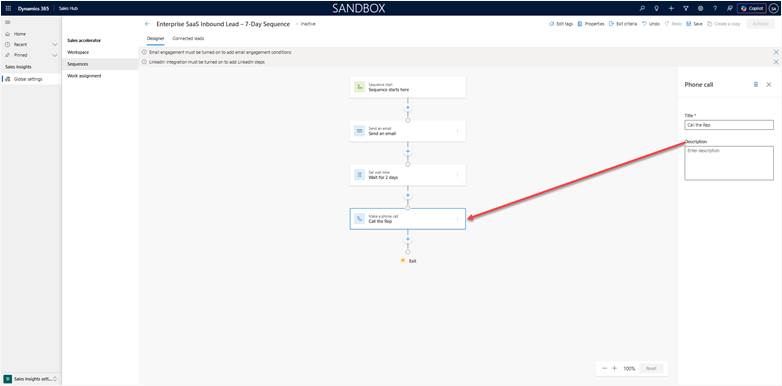
Step 5: Add a Phone Call Step
Phone calls remain one of the highest-converting touchpoints in B2B sales. Adding a call step after your first email keeps the conversation warm.
- Click ‘Add a step’ → select ‘Make a phone call’.
- Write a brief script or talking points in the ‘Description’ field for the rep’s reference.
- Set the due time (e.g., Day 3).
- Mark call priority as ‘High’ for enterprise leads.
Step 6: Add a LinkedIn Touchpoint (Optional)
If your organisation uses LinkedIn Sales Navigator integrated with Dynamics 365, you can add a LinkedIn InMail or connection request as a sequence step.
- Click ‘Add a step’ → select ‘LinkedIn – Send InMail’ or ‘LinkedIn – View Profile’.
- Add a message template.
- Set timing to Day 5.
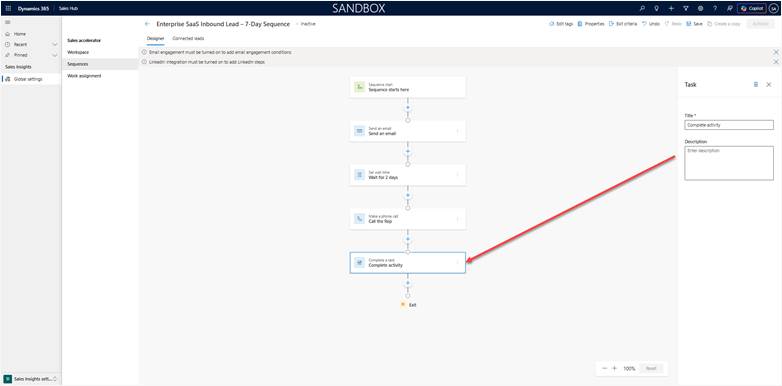
Step 7: Add a Follow-Up Task
Cap your sequence with a manual task — this ensures no lead falls through the cracks, even if they haven’t responded to any automated touches.
- Click ‘Add a step’ → select ‘Create a task’.
- Title it: ‘Final follow-up – assess lead status and update record’.
- Set due date to Day 7.
- Assign to the record owner automatically.
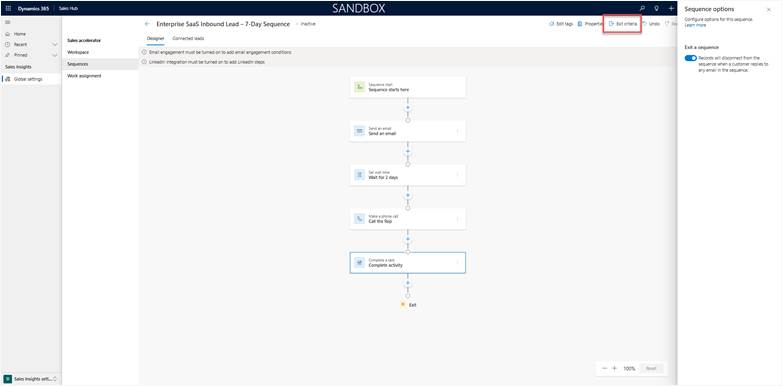
Step 8: Configure Sequence Exit Conditions
An often-overlooked but critical configuration: define when a lead should automatically exit the sequence. This prevents awkward follow-ups after a prospect has already booked a meeting or converted.
Under ‘Advanced Settings’ in your sequence, configure exits for:
- Lead status changes to ‘Qualified’ or ‘Converted’
- An email reply is received (if using email engagement tracking)
- A meeting is booked via Dynamics 365 Scheduling
- The record is manually removed by a rep
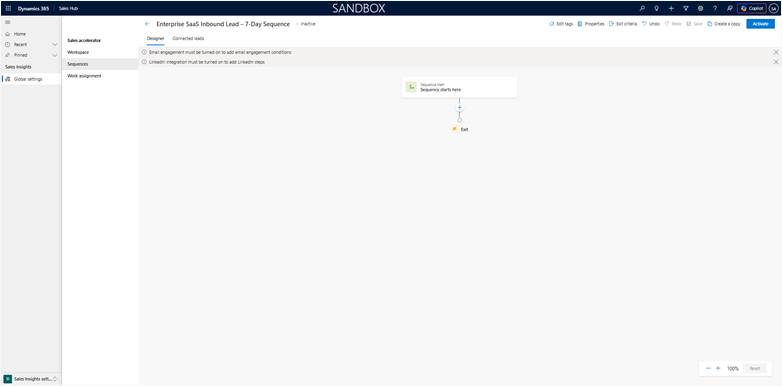
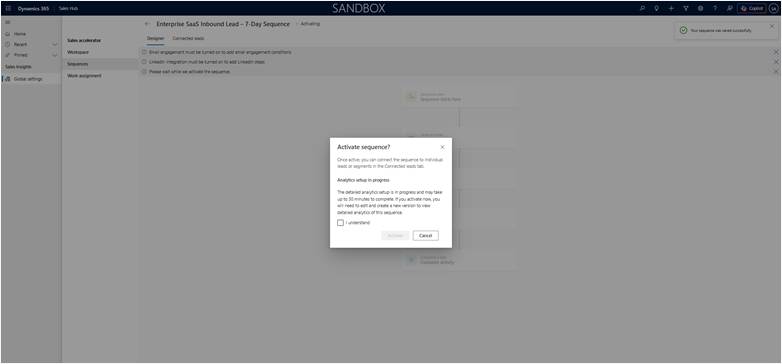
Step 9: Activate and Connect the Sequence
With your steps configured, it’s time to go live.
- Click ‘Save’ and then ‘Activate’ in the sequence editor.
- To connect the sequence to leads, navigate to a Lead or Contact record.
- In the Sales Accelerator panel on the right-hand side, click ‘Connect Sequence’.
- Select your newly created sequence from the dropdown.
- Click ‘Connect’ — the sequence will begin running immediately per the configured schedule.
Step 10: Monitor Performance with the Sales Accelerator Dashboard
Once your sequence is live, use the built-in analytics to track performance and iterate.
Key Metrics to Track
- Email open rate and click-through rate
- Call connection rate
- Step completion rate per rep
- Sequence completion rate overall
- Conversion rate: leads that moved to opportunity during sequence
Where to Find Reports
Navigate to Sales Insights → Sales Accelerator → Analytics. You’ll find a rich dashboard with sequence-level and rep-level performance breakdowns.
Best Practices for High-Velocity Sequences in Dynamics 365
Building a sequence is just the beginning. Here are proven strategies to maximise results:
Keep Sequences Focused and Short
Research consistently shows that 5–7 touchpoints over 7–10 days outperform longer sequences. Short, targeted sequences prevent prospect fatigue and keep your CRM queue manageable.
A/B Test Email Subject Lines
Duplicate your sequence and vary the subject line on Step 1. Compare open rates after 30 days and roll out the winner across all new leads.
Segment Ruthlessly
A sequence for a CFO should look and sound entirely different from one targeting an IT Manager. Use Dynamics 365’s segmentation features to tailor messaging by persona, industry, and deal size.
Review and Refresh Quarterly
Markets change. Messaging that resonated in Q1 may fall flat by Q3. Schedule a quarterly sequence review with your sales and marketing teams to refresh templates, timing, and exit conditions.
Train Your Reps
The Sales Accelerator is only as powerful as the people using it. Run onboarding sessions, record Loom walkthroughs, and embed sequence usage into your sales onboarding programme.
Frequently Asked Questions (FAQ)
Dynamics 365 does not enforce a hard limit on sequence steps, but best practice recommends keeping sequences between 5 and 10 steps. Excessively long sequences reduce engagement and increase administrative overhead.
Yes. Sequences can be applied to Leads, Contacts, and Opportunities. Simply select the appropriate entity type when creating the sequence.
The Sales Accelerator (including Sequences) is generally available in all major Dynamics 365 regions. However, certain AI-powered features within Sales Insights may have regional availability restrictions. Check the Microsoft documentation for the latest availability map.
No. Only one sequence can be active on a lead record at any given time. To switch sequences, you must first disconnect the current sequence.
Sales Accelerator and High-Velocity Sequences are cloud-only features available exclusively in Dynamics 365 Online (cloud). They are not supported in on-premises deployments.
Read more : dynamics 365 net core middleware integration
Conclusion
Building your first High-Velocity Sequence in Dynamics 365 is one of the highest-ROI investments your sales team can make. By combining structured outreach, intelligent automation, and rich CRM data, you transform cold leads into warm conversations — at scale, with consistency.
The steps we’ve covered in this guide give you everything you need to:
- Configure Sales Accelerator correctly
- Design a multi-touch sequence tailored to your buyer persona
- Monitor, iterate, and continuously improve performance
Whether you’re running a small inside sales team or a global enterprise sales organisation, Dynamics 365 High-Velocity Sequences can be the differentiator that drives predictable, repeatable pipeline growth.
![]() is a software solution company that was established in 2016. Our quality services begin with experience and end with dedication. Our directors have more than 15 years of IT experience to handle various projects successfully. Our dedicated teams are available to help our clients streamline their business processes, enhance their customer support, automate their day-to-day tasks, and provide software solutions tailored to their specific needs. We are experts in Dynamics 365 and Power Platform services, whether you need Dynamics 365 implementation, customization, integration, data migration, training, or ongoing support.
is a software solution company that was established in 2016. Our quality services begin with experience and end with dedication. Our directors have more than 15 years of IT experience to handle various projects successfully. Our dedicated teams are available to help our clients streamline their business processes, enhance their customer support, automate their day-to-day tasks, and provide software solutions tailored to their specific needs. We are experts in Dynamics 365 and Power Platform services, whether you need Dynamics 365 implementation, customization, integration, data migration, training, or ongoing support.
Share This Story, Choose Your Platform!
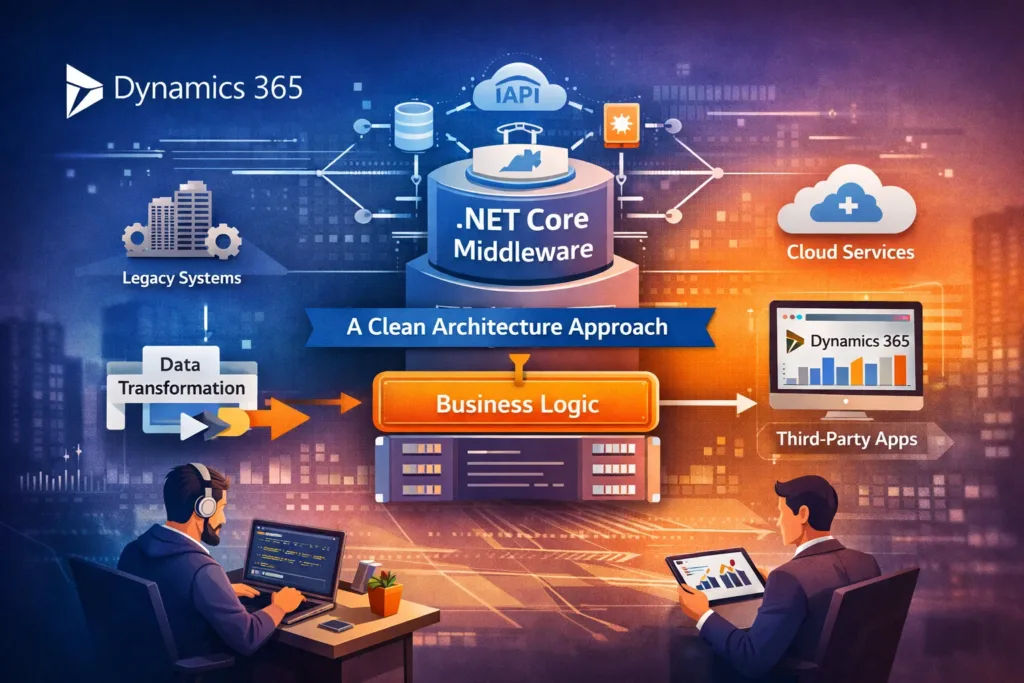 Integrating Dynamics 365 with Custom .NET Core Middleware: A Clean Architecture Approach